- Published on
Automated Website Scraping
- Authors

- Name
- Eric McCowan
- @ericrmc

Accessing rich datasets from public web platforms is a common scenario for clients and the trend looks set to continue. The number of social media users is growing by the millions as more people get access to faster and cheaper smart devices. For one of our clients, getting data from some of these online platforms and matching them with their internal databases seemed like it would be a time consuming process. Their requirements were based on compliance checks, so each post needed to be captured and logged in its entirety so that they could be cross-checked and analysed.
An ideal solution would automatically present near real-time data capture results in a web portal that linked key attributes with their internal database systems and flagged compliance issues. Capturing and logging the content of user posts allowed for analysis even if the post was later updated or deleted.
The first step in the process was to choose a suitable web scraping framework. A Python based open-source library named Scrapy was chosen for this project because of its popularity and versatility in scraping different types of websites. The official page is https://scrapy.org/
Scrapy provides an interface for connecting to web pages and capturing information using style sheet (CSS) or XML interpreters. If you right-click on an element in Chrome and select 'Inspect', you can see the source code in the right panel. As a quick example, posts on the Servian jobs page look like this in the inspector:

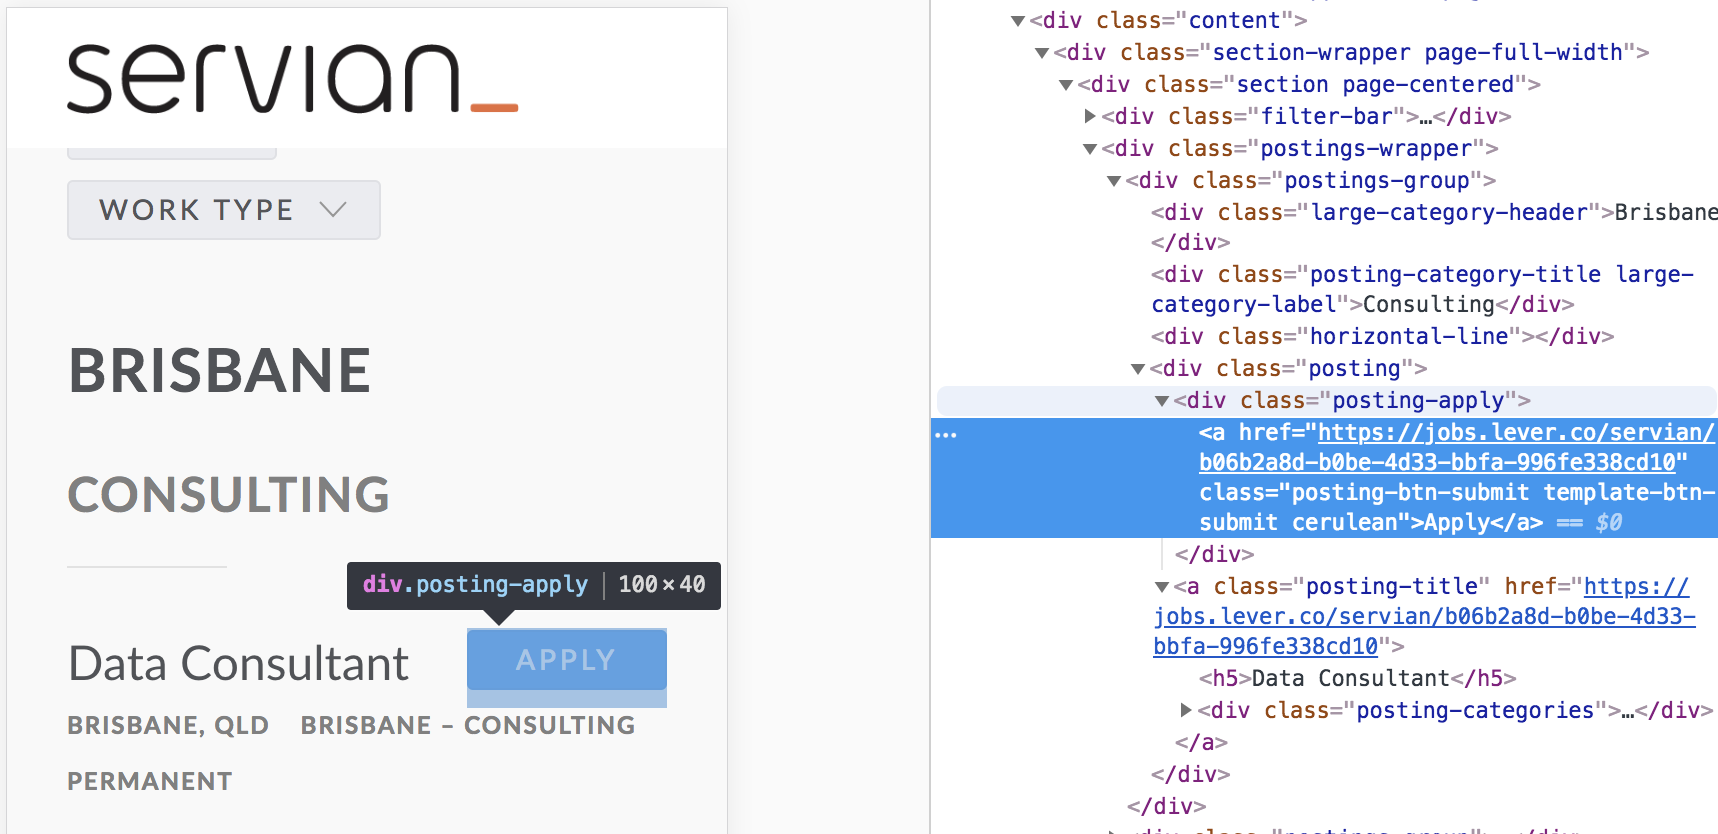

We can see the 'Data Consultant' role falls under <div class="posting-apply">. There is also an a tag containing an href= value, which is a hyperlink to the job details page. This information can be passed onto Scrapy to help configure it for this particular website.
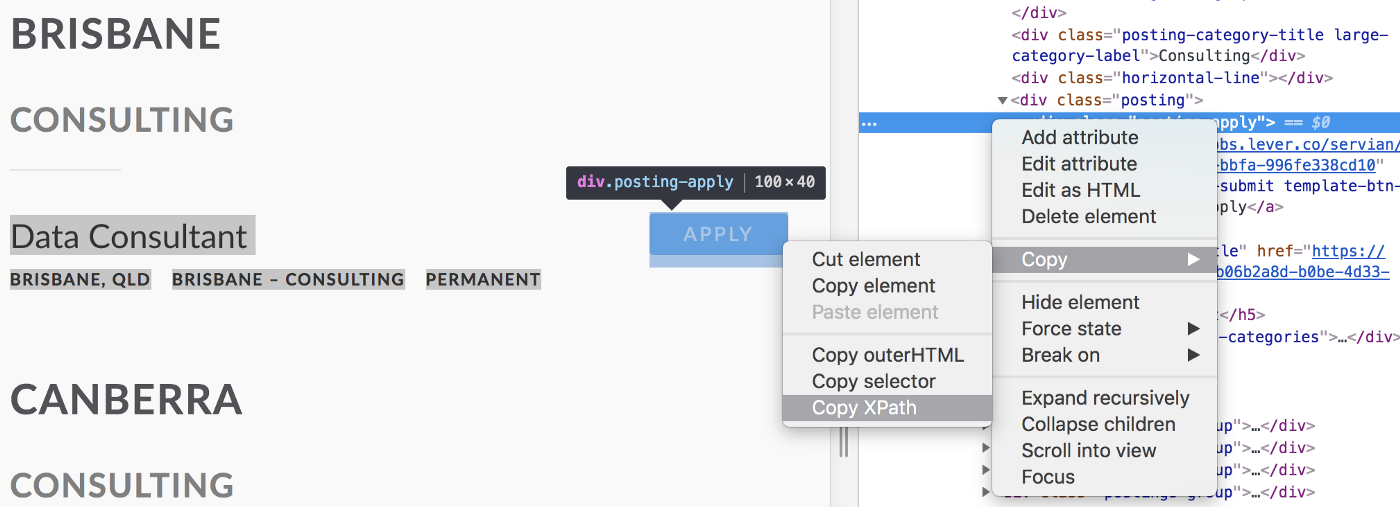
Alternatively, the XPath can be used to locate an element on the page:

To get started with capturing web content, install Scrapy using Anaconda Navigator or pip install scrapy. The application has a shell interface to test code or to manage and launch spiders:
scrapy shell
This will start a Python shell to interact with your scrapy spider. Some supported commands are:
# Captures page as 'response'
fetch('http://url')

# Opens captured/saved page in default browser
view(response)

# View all hyperlinks
response.css('a::attr(href)').extract()

# View links in div1
response.css('[id=div1] a::attr(href)').extract()

# View image_urls - configure settings.py for saving these
response.css('img::attr(src)').extract()

# View links containing 'domain'
response.css('a[href*=domain]::attr(href)').extract()

# View text in a particular class
response.css('[class="section"] div::text').extract()

# View text in a particular XPath
response.xpath('//html/body/div[2]/div/h2/text()').extract()
The XPath address style can be used instead of the CSS for locating elements. Continuing from the Servian jobs example, where our Data Consultant link was contained in the posting-apply div class, we can retrieve a list of all job post links on the page by entering the following:
fetch('https://jobs.lever.co/servian/')
response.css('[class=posting-apply] a::attr(href)').extract()
The resulting job post list looks like this:

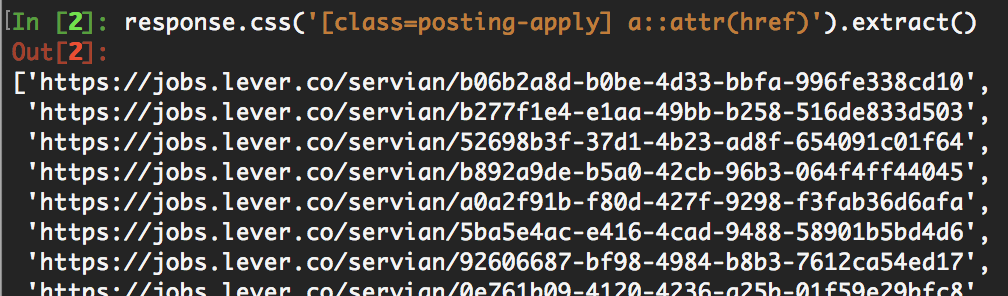
We include a::attr(href) because in this case it is the links we are interested in, and they each have the a href attribute. Specifying class=posting-apply limits the results to those contained in the posting-apply div class. This list can be saved out to a file, or processed again by Scrapy to capture additional information from each page.
For larger jobs, Scrapy uses 'spiders' to help scan website pages for content like links, text and images. Because websites have different layouts, a spider needs to be configured for each one. This configuration is done by modifying the template Python code that comes with the spider once it's been created.
To make a new spider, first exit the shell and navigate to your project directory, then you can make a new scrapy project that contains its own folder structure:
scrapy startproject myproject
Navigate to this folder with cd myproject and run:
scrapy genspider myspider http://site-to-scrape.com
The myproject directory will now look like this:
|____myproject
| |____spiders
| | |______init__.py
| | |____myspider.py
| |______init__.py
| |____middlewares.py
| |____settings.py
| |____items.py
| |____pipelines.py
|____scrapy.cfg
The two places that are important are settings.py and /spiders, where you will find the myspider.py script template. It has been autofilled to help get started, but ensure the domains and URLs are changed to the format below:

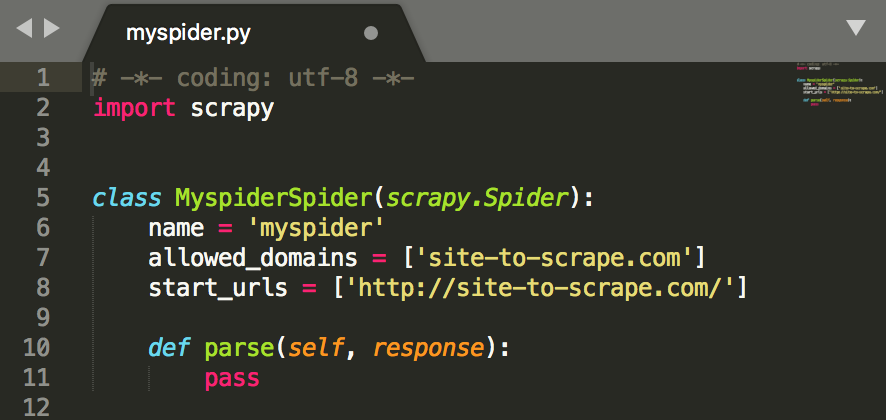
The spider's parse function controls the main behaviour. You can build up start_urls beforehand using other data sources. However this is not recursive; if you wanted to go one page deeper and extract data from links scraped from the start URL, you may need to use something like the callback argument and an additional function. An an example, this code will follow links once and then save some content from that new page before returning:
def parse(self, response):
    links = response.css('a::attr(href)').extract()
    for url in links:
        yield scrapy.http.Request(url, callback=self.parse_page)

def parse_page(self, response):
    title = response.css('[class="posting-headline"]
        h2::text').extract()
    text = response.css('[class="section page-centered"]
        div::text').extract()[1]
    scraped_info = {
        'title' : title,
        'text' : text
                }
    yield scraped_info
yield scraped_info passes a dictionary of items back over to the Scrapy pipeline for processing/download. If downloading images, ensure the variable name image_urls is used so the pipeline will detect it.
In the above example we chose to capture the page title and some specific text content as items inside the scraped_info dictionary. You may also want to enable the FEED_ settings (in settings.py, detailed later) to get it to automatically generate a CSV with all the scraped information. Scrapy will create one column for each item you've saved into the scraped_info dictionary, so in this case the CSV has 'title' and 'text' columns, and one row for every visited page.
Once this parse() function is configured for your particular website so that it saves what you need, you can save the script and initiate it with:
scrapy crawl myspider
The settings.py script is used to store configurations of all spiders in a project. These might be helpful while testing out how it works:
BOT_NAME = 'myscraper'
ROBOTSTXT_OBEY = True
USER_AGENT = 'MyContact (me@example.com)'
ITEM_PIPELINES = {'scrapy.pipelines.images.ImagesPipeline': 1}
IMAGES_STORE = 'images/'
IMAGES_MIN_HEIGHT = 80
IMAGES_MIN_WIDTH = 80
MEDIA_ALLOW_REDIRECTS = True
IMAGES_EXPIRES = 1  # How many days images stay current
DOWNLOAD_DELAY = 1.0  # 1 second delay between requests
AUTOTHROTTLE_ENABLED = True
FEED_FORMAT = "csv"  # save results to CSV, JSON or XML
FEED_URI = "myspider.csv"  # results filename
More settings can be found at the official documentation. These can alternatively be placed in custom_settings dictionary within the spider.
There is potential for hurting web servers with the huge amount of concurrent requests possible with Scrapy. Using the spider politely is important for maintaining a friendly web. This article at ScrapingHub contains some great information in addition to the quick notes above. In short, keep ROBOTSTXT_OBEY = True to ensure your spider stays within the bounds set by the site's administrator, assuming the file exists (otherwise your spider will stop and throw an error).
In the case you are interested in all but a few links on the site, you could take note of the note the div id in the page's CSS for the items you don't want. Generate a list of bad_links for this particular group, then when you need to clean your main set of links, run a list comprehension like this to filter them out:
for url in ([u for u in links if len(u) > 4 and u not in bad_links]):
        ...
As an additional tip, urljoin is from the urllib library is indispensable when parsing hyperlinks from sites that use only relative links. This function concatenates the base URL and the page link without any redundancy:
from urllib import parse

url = '/relative_or_full_link'
url = parse.urljoin(response.url, url)